Showing posts with label nail art. Show all posts

Monday, 9 June 2014

ImPRESS Review

Hello! Hello! 

I know I've been away for a little while but I'm back and this time with a review! You nail enthusiast will probably like this one. 

Influenster and Broadway nails send me a lovely package with ImPress nails to test out, so here is my honest opinion. 
I've always seen these at the drugstore and have wanted to purchase them but have always been hesitant because they are just stick on nails, so how good can they really be? Well boy was I wrong. I honestly wasn't expecting too much from these nails but honestly, they really have impressed me! 


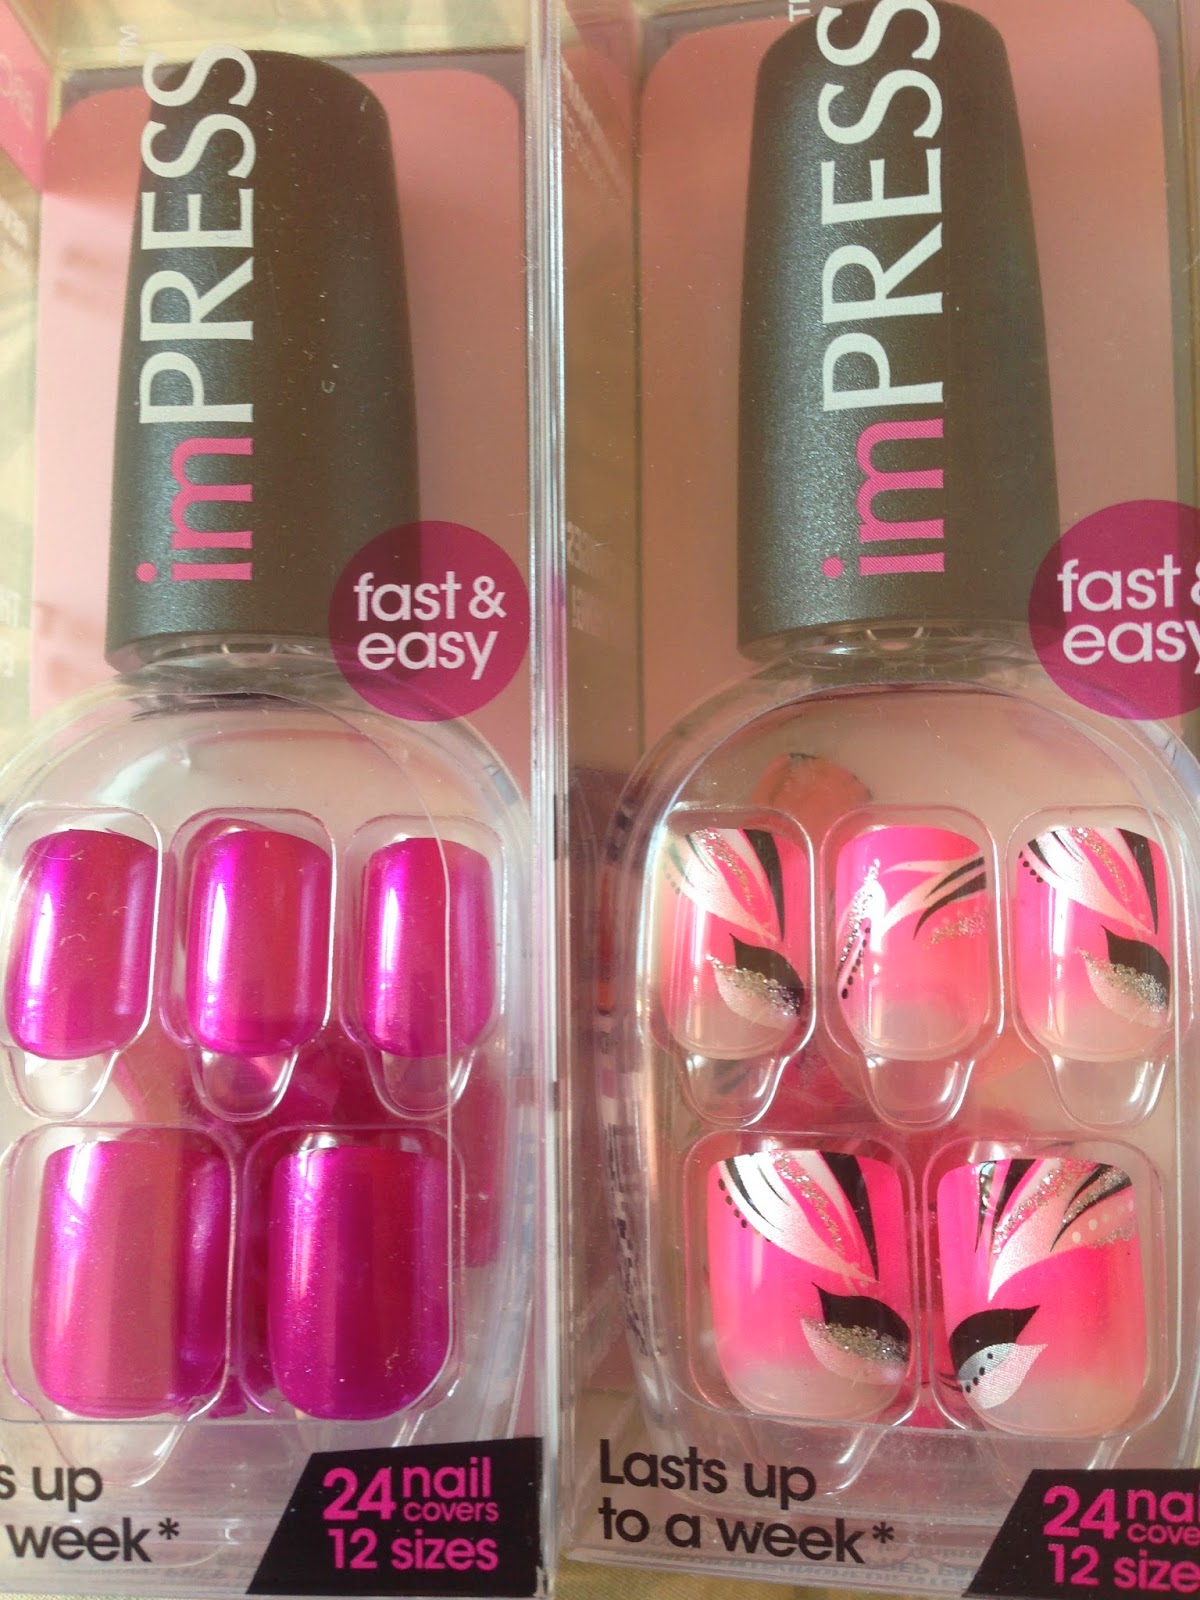
The reason why I picked the design-ey ones to try out is because the pink ones were see through and I didn't have time to paint over them. 

I quickly filed my nails and buffed the top to remove the natural shine so the nails can stick better 
- I forgot to use the prep pad, but honestly I don't see how it'd be helpful. My guess is that it's an alcohol pad to remove oil and shine from the nails 
I then laid out the nails that would fit me in the order I'd stick them on to make the application process a little faster.

I then quickly stuck them on and went on with my day. The package said to avoid getting the nails wet for about 30 minutes, which I did obey :)
I naturally have thin nail-beds so any kind of 'fake' nail always looks big on my hands.


As I said, for stick on nails I wasn't expecting much from these but boy did they blow me out of the water. 
For the next few days I really did put a number on these nails at work yet not a single one fell off!!! By day 5, I got tired of them and the design so I soaked my nails in acetone to remove them. 

I honestly love these nails and will definitely be repurchasing them!!! The only thing I didn't like about them was that when I would run my hands through my hair, my hair would get caught between the fake nail and my own nail and by day 4, the design started to fade at the tips. 


As you can see, the edges had started to round out and the design had started to fade.

I know this particular design is a little tacky, however they have other super cute designs. I highly recommend these nails if you guys have an event to go to bad don't have time to do your own nails or get them done!

Have you ever tried Broadway's ImPRESS nails?

- Anahid


Wednesday, 16 April 2014

DIY Easter Bunny Nail Art


Why hello there!

With Easter just around the corner and my love for nail-art rekindled, I thought that a DIY nail design would be perfect for today’s post. As you will be able to see in my pictures, I am not a professional nail artist by any means – I just enjoy nail polish and nail art a little too much.
I have to credit the amazing CutePolish for this cute and easy Easter Bunny design. If you guys love nail as much as I do, you should definitely check out her YouTube channel for more amazing styles.
For this design, I used polishes that I already had, so feel free to substitute them for whatever you have at home. Here we go:


I always start off my filing, shaping and painting a protective topcoat over my natural nails. I typically use OPI Nail Envy and top it off wit Sephora by OPI basecoat.


To make things a little more festive, I painted a thin coat and very subtle coat of a glittery polish as a ‘background’ for my bunnies. 
OPI Servin’ Up Sparkle


 Now this part takes a little patience. You want to paint a half circle at the tip of your nails. This looks weird, but this will eventually become the face for your bunny.
OPI Alpine Snow


Next, you want to use a dotting tool, a toothpick, or anything thin enough to paint the ears. Paint two vertical white stripes coming out of the half-circles, going ¾ of the way down your nail. Make sure they’re thick enough because we need to paint the inside of them pink.
OPI Alpine Snow


For this next step, I recommend using a toothpick because they always seen to be the perfect width to colour in the white ears. With pink polish, you want to ‘dot-in’ the white stripes we just painted to add a little more detail to the ears.
With that same toothpick, add a little pink dot at the tip of your nail for the nose.
Sephora by OPI Diva-in-Training


I also use a toothpick for this last step. Dip your tooth pick in black polish and dot two little eyes for your bunnies. If you’re feeling confident, you can also use a flicking motion to create whiskers by your bunny’s nose. I was too lazy to do it on all of my nails so I just did it on my ring finger.
Sephora by OPI Never Enough Shoes


Now for this final step, I highly encourage using a quick-dry topcoat to seal in your design.
Sephora by OPI Quick Dry Top Coat
Your topcoat doesn’t have to be ‘quick dry’, but I definitely recommend using some sort of topcoat. I just use it because you don’t have to worry about smudging your nails and not the mention the fact that I am one of the most impatient people I know. 


Thats it! Your little Easter bunnies are now complete! I know it seems super simple when you break it down in about 5 steps but it does take A LOT of patient, q-tips and nail polish remover. 
I'd love to see your recreation of this design so make sure you post pictures in the comment section below :) 

I hope you all have a wonderful week building up to the Easter long weekend coming up!

- Anahid